Using EPSON SureColor F2100 for amazing DTF Transfers
Steps to printing DTF Transfers on the F2100
The EPSON SureColor F2100 Direct-to-Garment printer is the most popular DTG printer in the industry and now you can create Direct-to-film (DTF) transfers with a few easy steps.
Things you'll need to get started
POWDER ADHESIVE:
There many products out there and finding the right one with the garments you are using sometimes takes a little research. We have had good results with VELOX adhesive and Ecofreen hot melt powder adhesive.
ADHESIVE FOR PLATEN
We simply use double sided tape. Try and find one that isn't too sticky, you want to hold it in place, but still be able to remove the film without too much effort.
TRAY OR SHEET PAN
You'll need a tray or pan to be able to hold your adhesive and easily submerse your film into the tray. We found a sheet pan works well.
SILICONE SHEET
Many people use parchment paper or craft paper, we like using silicone sheets
Preparing the settings in Garment Creator
BEFORE YOU OPEN GARMENT CREATOR:
Make sure you have the latest update on the software 2.1.6+
WINDOWS ONLY SETTINGS (MAC Settings are to follow shortly)
Once you have installed the latest version of Garment Creator
Insert this file “EnableReverseMode” No need to open the file, simply download, and then move to the below listed location: C:\Users\YOURUSERNAME\AppData\Roaming\GarmentCreator\local store
* This is the typical location but some computers the files are saved a little different.
OPEN GARMENT CREATOR
Look under the white management tab to see if you have INK ORDER listed. You are going to select Reverse (color->White)

SETTINGS
- Start with Dark Color T-Shirt preset
- Select Level 3 to 5 print quality depending on the detail of the image.
Don't do level 6! it will lay down 2 passes of white.
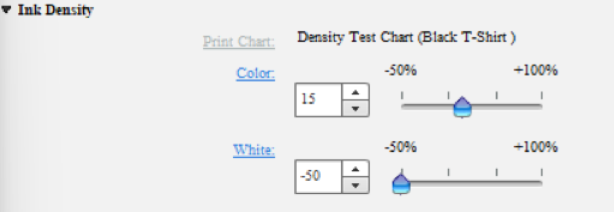
- Under Ink Density tab change color to +15 and white to -50

SETTINGS Continued
- Under White Management tab select reverse on the ink order
- Now you can save this preset so you can easily apply these settings when you choose to print DTF transfers in the future. If saved properly, you'll be able to just select your DTF preset.
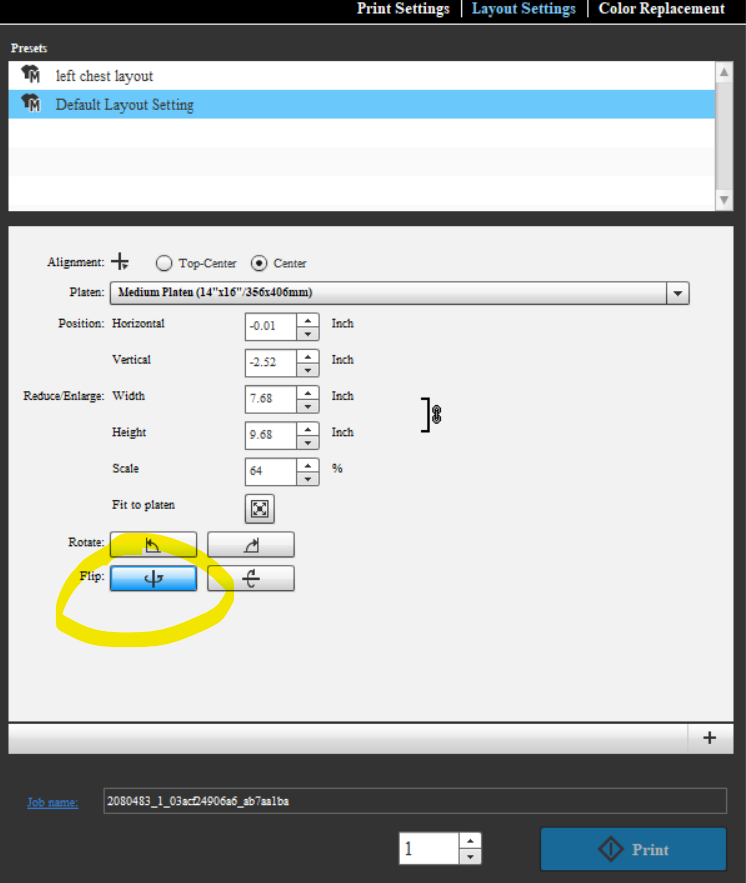
- Reminder: Before you print - Don't forget to flip the design!

BEFORE YOU PRINT ON YOUR FILM
- put your double sided tape down on your platen to keep the film in place so it doesn't move during printing
Preparing your transfer before pressing
PUTTING ADHESIVE ON THE PRINT:
Check out the video - there are many ways of putting the adhesive powder on there, but this way works pretty darn good, and doesn't get the powder all over the place.
Gel the DTF Adhesive Powder:
Set press at 370 and let the press hover about 1/2 inch above the film for 2 minutes.
* your looking for the powder to become a clear shiny consistency
To press the transfers:
- Set heat press at 270 deg and press with light to medium pressure for 15 seconds
- Allow transfer to cool then peel off the cover sheet.
*if the edge tries to lift with the cover sheet press for more time or pressure 5 more seconds typically
- Once you peel cover places a piece of cotton or another shirt over the DTF and re press for 5 seconds.
This takes the gloss out and makes the transfer look more smooth. But you can play around with different looks and feel based upon your desired outcome.

